FIT Level 1 Clinic with Simon Lawton

FIT Level 1 Clinic with Simon Lawton
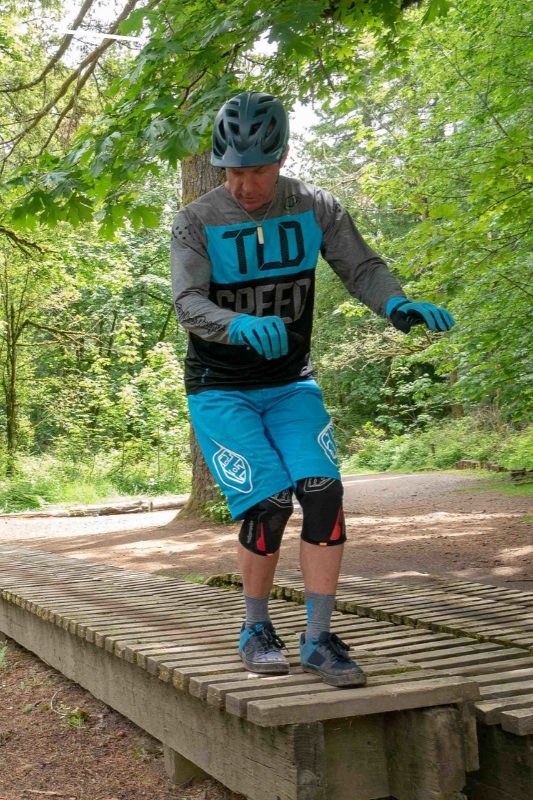
Whether you are aiming to teach for a living, help your friends, or wanting to transform your own riding – our FIT (Fluidride Instructor Training) Level 1 Clinic will get you started with powerful tools for evaluating and improving rider form. This two-day, 15 hour instructional program is designed to transform your own riding while giving you the insights needed to coach riders of all skill levels. In this class, you will learn the ins and outs of teaching our most popular offering, our Adult 2-Day Clinic which is comprised of Trail Essentials, Air 101, as well as aspects of Advanced Cornering, and Progressive Trail Skills.
FIT is the fastest and most comprehensive way to dive deep into your own riding, and be able to share and communicate these learnings with others. It’s perfect for anyone passionate about the art of coaching, or who simply appreciates the fine details behind exceptional riding.
Class held at Duthie Hill Mountain Bike Park, Issaquah, WA.
Where to meet: The group will meet in the central clearing of Duthie Hill park, next to the large covered shelter. Plan on arriving early (we recommend 20-30 min) so you have time to park and pedal in to the clearing.
- - - - - - - - - - - - - - - - - - - - - - - - - - -
The intention of the class is to bring Fluidride's coaching techniques and years of teaching experience to other organizations to help shape their own coaching strategy and tailor their own program. It's also our opportunity to help volunteer coaches and those helping with kids programs up-level their coaching. However, it is not a formal certification.
- - - - - - - - - - - - - - - - - - - - - - - - - - -
Cancellation Policy: If you are unable to attend your original class, notify info@fluidride.com 7+ days prior to your class date to either reschedule or receive a credit. Within 7 days of the class date, we do not offer credits or rescheduling, however you may transfer your spot to another rider at no charge.
Up to one reschedule allowed per registration.
Credits are valid for one year and may be applied to any group class.
No refunds after purchase.
DEEPEN YOUR UNDERSTANDING - OVERVIEW MATERIALS - SAMPLE QUESTIONS
Course goals and core components
Increasing communication skills
Learning to teach to 3 common learning modalities – visual, kinesthetic, and auditory - We also touch on teaching to digital learners.
Learning skills necessary to assess a rider's strengths and weaknesses
Drills setup and creation – teach anywhere!
Improving instructor riding technique for use in demonstration
Understanding how basic principles of movement affect and compliment advanced techniques
Class methodology – how to create an effective class
Learn to use your phone (camera) for instructional purposes, and how to use other pre-created videos to teach more effectively
FIT Methodology - How we teach
Spotting rider flaws
Detailed breakdown of techniques covered
On-trail instruction – how to create effective drill techniques
On-trail teaching opportunities for all instructors in training
Feedback after each instructional opportunity
Biomechanics of human movement as it pertains to technical riding
Skills sets/techniques covered – FIT Level 1
Using voice to create positive reinforcement as riders progress
Showing riders their unique strengths and weaknesses as a rider, both via demonstration and by use of video when applicable
Learning to create a sense of shared goals within a group
Learning to teach the language of three major learning modalities
Body Position(s): Throne position, attack position, climbing position, sprinting position
Braking - creating strong braking with good modulation
Footwork and how it pertains to all areas of riding
Spotting rider biases during drills
Flatland Turns – for use in initial assessment of rider biases – to teach proper form
Bermed Turns – understanding lean relative to the ground – timing of turns
Switchback Turns – introduction to double footwork
Moving through undulating terrain
Moving into steep descents
Climbing technical terrain
Climbing switchback turns
Wheel lifts and manual basics
Drops: Three types. Correct Basic Form – Preloading – The Lunge
Jumps: Learn the ins and outs of basic jump technique
Featuring: Learn to jump using natural terrain
Skills Taught – FIT Level 1 – High Level Breakdown
Body Position(s): Throne position, attack position, climbing position, sprinting position
Throne Position – The term Throne Position was coined by Simon Lawton and is based off the top descenders’ position when riding. Throne position stacks the body up over the bike in a way that allows compression to move into both ends of the suspension or both tires when descending or interfacing with terrain. Throne position also balances the rider over the bottom bracket in a way that allows the rider to gain access to the rotating portions of the bicycle. Throne position is used when descending and standing – not used when seated climbing. Throne Position drills are a great way to add to a rider's foundational base and also give instructors a glimpse into rider biases
Attack Position - We move through this position from Throne Position in a number of instances
Climbing Position – Climbing Position puts the rider in a seated position where traction can be maintained through use of the body to weight the tire that needs weighting. Climbing position also puts the rider in a position to put out power when seated.
Sprinting Position – Similar to Climbing Position but used only when standing. This puts riders in a good place to create power when standing.
Homework – Sample Questions:
How does spinal posture differ in Throne Position as compared to climbing and sprinting posture?
Why is it important to have a straight (but not necessarily upright) spine while descending?
Footwork
Footwork is essentially the use of the rotating portions of the bicycle to optimize rider performance. The main elements are the ability to control the feet in relation to both the bottom bracket, and the pedal spindles. We refer to footwork when riders are in a non-pedaling position on the bike (descending).
Footwork as it pertains to the bottom bracket is really about controlling the feet in an optimal way in order to engage with the terrain being ridden. Footwork is all about controlling foot movement when descending or cornering.
Footwork as it pertains to the bottom bracket is perhaps the single easiest way to spot rider biases during cornering drills.
Footwork as it pertains to the feet themselves is taught by creating an understanding of the power of the control over the pedal spindles. Loss of control over the pedal spindles can cause sub optimal riding outcome. The two most common pedal spindle biases come from an overly active Achilles tendon or conversely, from standing too far toward the toe of one or both feet. Balance – and being able to move in either direction with the heel – or toe – is the goal.
Associated Concepts
Control over bottom bracket rotation
Control over pedal spindles
Phenomenon of lateral acceleration
Sample Section Questions for Homework – Footwork:
What is footwork?
How might an imbalance in footwork find its way into aspects of riding? Discuss three ways.
Spotting Rider Biases during Drills
Rider biases can be spotted while following riders, or while doing drills. The two easiest places to spot biases are while doing body position drills and flatland or bermed turn drills. Learning to spot and fix a rider bias is the fastest way to improving rider ability. Helping fix a bias will not only help the rider with the skill being taught, but will also find its way into helping everything the rider does on the bike. In this class, we’ll focus on spotting biases during drills. This is the safest way to teach other riders and allows instructors to teach riders effectively, regardless of the ability of the rider. An effective instructor will be able to make significant improvements, even in riders who are more advanced than they are.
Homework Sample Question
What is the most typical rider bias? Discuss how to spot and way to correct this bias.
Flatland Turns
Flatland turns are perhaps the best way to spot biases. We’ll learn the ins and outs of Flatland Turns, and how to use a “One-Footed Drill” to create kinesthetic awareness while turning in both directions. We’ll also work on understanding the concept of front-foot and back-foot turns in this section. Bike lean relative to the rider will be discussed, and we’ll introduce the slalom drill and discuss how this drill can create an internal sense of flow on the bike. Flow can be taught!
Homework Sample Questions:
What are the two main benefits of adjusting rider form using a one-footed turn?
Should riders maintain a '6 and 12' position or '3 and 9' position when cornering?
If a rider is too far back on the bike, or is dropping the heel too much when cornering, how might we help them with this?
Bermed Turns
Instructors will learn to help riders rail supported turns in order to create control and lateral acceleration. Teach a rider to ‘snap’ a bermed turn, and you have a friend for life! We’ll discuss timing, footwork and angle of lean relative to turns.
Homework Sample Questions:
How does bike lean relative to the body in bermed turns differ from lean in flatland turns?
What is the phenomenon called that allows us to create speed from turns?
How is the bicycle uniquely suited for cornering? (Hint: Why is it faster down a trail than a motorcycle?)
Switchback Turns – Introduction to double footwork. Once we’ve created a comprehensive understanding for effective footwork, we’ll go into the use of double footwork and discuss concepts related to effective wheel paths for switchback turns and how they differ from wheel paths with traditional single footwork.
Homework Sample Questions:
Why do we create a pre-turn before a switchback turn?
How is our pre-turn affected when the switchback is very tight?
Moving through undulating terrain
In this section, we’ll work on correct position while rolling through terrain and how this basic drill pertains to rough terrain and quick, steep descents. This is another great place to see rider biases come to life – especially as it pertains to riders who ride too far back on the bike, or lean too heavily on one foot.
Steep descents - Teach riders to roll steep descents safely.
Homework Sample Questions:
How does being too far back on the bike actually put the rider too far forward and out of balance on real terrain?
How does this apply to quick, steep descents?
Why is the mantra ‘get your butt back for a steep descent’ oversimplified?
Climbing technical terrain
Proper position, as well as the concept of surging, will be taught. Learn the most effective ways to get over tough obstacles and up climbs.
Homework Sample Questions:
What is surging?
What is the relationship of outright speed to acceleration in clearing obstacles?
Why does enhanced foot speed allow us to clear sections we might not otherwise make?
Climbing switchback turns
We’ll tackle the ins and outs of steep switchback climbs in short order – this is a really fun technique to teach, as most riders pick it up right away.
Homework Sample Question:
Describe how to approach switchback turns when climbing.
Drops: Three types. Correct Basic Form – Preloading – The Lunge
Correct Basic Form is the best way to tackle most drops. Once riders learn to use Correct Basic Form, drops become quite simple in general. Preloading is a technique for instances where we need to create distance off a drop. Lunging can be used in instances where trail speed is very low, and allows the rider to Lunge Roll drops which might not otherwise be roll-able.
Homework Sample Questions – Drops:
Why don’t we just pull up to go off a drop?
Why could it be said that Preloading is like turning a drop into a jump?
What are the advantages of Correct Basic Form in terms of trail speed and ability to ride trails with turns directly following drops?
Jumping: The basics explained. Learn how to get riders off the ground - and back - safely.
Homework Sample Questions - Jumps:
Why might a rider be pulled forward off a jump?
What causes riders to ‘come up short’ with a rear wheel first landing off jumps?
Featuring off natural terrain - Teach riders to jump off and over natural terrain
How is featuring similar to a J-Hop?
What is the single most common cause of a rider not getting both wheels to land in the same place when featuring?